
The key to dyeing concrete is preparing the surface with cleaning tools and etching agents. Then, to protect the quality of the color, seal the dye after application.
Concrete dye can completely change the tone of a space. Understanding the dye process will produce successful results. This is true whether you aim for a modern industrial look or want to add color to your commercial space.
For example, eliciting warm or cool colors can influence employee productivity, and guests will appreciate a branded commercial space. Of course, many modern residential areas currently utilize finished concrete floors as an alternative to floor tiling or hardwood, and these, too, can benefit from a quality dye job.
This post will cover how to dye concrete with lasting results.
CAN I DYE EXISTING CONCRETE?
Yes, you can dye existing concrete. However, the success of your dye application heavily depends on the condition of the concrete.
Old or heavily worn surfaces might need extensive preparation, such as grinding or deep cleaning. This will allow the dye to adhere properly.
For best results, carefully follow the preparation steps.
STEP 1: TEST THE CONCRETE FOR COMPATIBILITY
Finished concrete will not take well to your concrete dye, so you’ll need to test it to see if it is ready to receive the dye. You can do this by implementing a drop test. Take a little water and leave a few droplets across the concrete surface.
When you see beaded-up water that stays on the surface, it means the concrete has sealer. This will not bond well with the dye. If the water soaks into the concrete over time and darkens, it should be ready to absorb the dye.
Performing this test can save you time and ensure a more vibrant and lasting color application.
STEP 2: COVER WALLS AND ANY FURNITURE OR MACHINERY YOU WANT TO PROTECT
As you may know, dyes can get places – especially places you’d rather avoid staining. Be sure you cover up walls and items you can’t move out of the area. You can use plastic sheets and tape or whatever is convenient.
If you end up using a sprayer to apply your dye, you’ll be glad you did. This step leads to a clean workspace and prevents any unwanted dye splatters that can be difficult to remove.
STEP 3: SWEEP, MOP, AND ETCH YOUR FLOOR
Sweep up dirt and debris with a good broom, preferably one that can cover a lot of ground. You may need a heavy-duty cleaner to remove stubborn spots. This is especially true if there are excess oils or chemicals on the surface,
Oils and chemicals can be removed using concrete etching agents, which clean and roughen the concrete surface. This allows the dye to penetrate more deeply. Commercial garages or machine shops are more likely to need this extra step due to the prevalence of oils and chemicals.
Otherwise, go ahead and start scrubbing with a damp mop. But make sure you let it completely dry before you move on to the dyeing phase. Proper cleaning allows the dye to penetrate deeply and evenly, providing a uniform color across the entire surface.
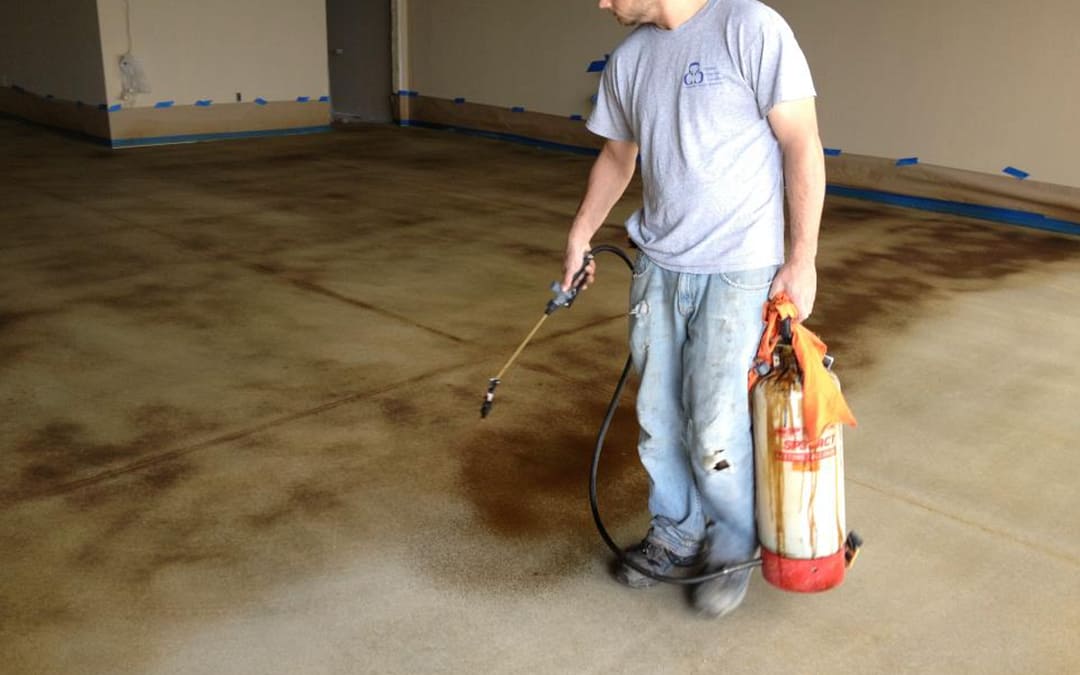
STEP 4: APPLY THE CONCRETE DYE
Use a sprayer for an effective coat of dye. This will deliver a consistent spray and all-around safer application than a paint roller or other alternative.
Before getting too far in, ensure the dye comes out consistently without drips falling from the wand. This will help you prevent an inconsistent coat.
Once you’ve got a clean spray, go ahead and apply the dye in a circular or figure-eight motion. This will help build up the color evenly. Try to keep the wand about a foot from the surface as you spray. Consistency in application is key to achieving the desired aesthetic effect.
HOW MANY COATS OF DYE SHOULD I APPLY TO MY CONCRETE?
Apply at least two coats of dye to your concrete. Wait two hours between coats if the room is ventilated – or longer if necessary. We recommend three coats as a safe bet. Multiple coats enhance the depth and richness of the color, ensuring a durable and lasting finish.
STEP 5: SEAL THE SURFACE
Once dry, use a dust mop to clean the newly dyed surface and seal the concrete immediately. You can also use a sprayer for sealing. Adding two coats of sealer will protect your surface against UV rays, scratches and scuffs, corrosion, and stains.
Sealing is the final touch that locks in the color and adds a layer of protection to maintain the concrete’s beauty over time.
HOW LONG DOES CONCRETE DYE LAST?
Typically, a well-applied dye with a good sealer can last several years, even in high-traffic areas. Regular cleaning and reapplication of the sealer as needed will help extend the life of the dye.
The longevity of concrete dye can vary depending on the quality of the dye, the amount of traffic, and how well the surface is maintained.
SHOULD I STAIN OR DYE A CONCRETE FLOOR?
To a novice or a homeowner, it may be difficult to tell the difference between concrete dyes and stains. Dyes can provide a deeper color saturation, while stains are more resistant to UV rays. Interior spaces may opt for dyes, especially those that rely on the color spectrum for interior design. On the other hand, if you prefer staining interior concrete, there are no inherent issues with that approach.
If the surface has a lot of exposure to the sun, then your best bet is to use concrete stain. Of course, a quality sealer can also help with UV resistance.
Understanding the differences between dyes and stains can help you choose the right product for your needs and achieve a satisfactory outcome.